
How to Build a Gaming PC: A Step-by-Step Beginner’s Guide
Introduction
Building a gaming PC is one of the most rewarding experiences for gamers and tech enthusiasts alike. Unlike pre-built systems, a custom gaming PC allows you to tailor performance to your needs, future-proof your setup, and even save money in the long run. Whether you aim for smooth 1080p gaming, high-refresh-rate 1440p, or 4K ultra settings, understanding how to build a gaming PC is essential.
This guide provides a complete roadmap—from selecting the right components to assembling your machine, installing software, and optimizing performance for maximum gaming experience.
Why Build a Gaming PC Instead of Buying Pre-Built?
There are several compelling reasons to build your own gaming PC:
- Better Value for Money: Custom builds often deliver higher performance for the same budget.
- Upgradeable Components: Swap out GPU, CPU, or storage without replacing the entire system.
- Learning Experience: Understand hardware, maintenance, and troubleshooting.
- Customization: Choose case designs, cooling solutions, RGB lighting, and peripherals to match your style.
Building your own PC also empowers you to make informed decisions about performance vs. cost.
Step 1: Plan Your Budget and Requirements
Before buying components, define your gaming goals:
- Casual 1080p Gaming: Budget around $600–$800 (~200k–250k PKR)
- Competitive 1080p/1440p Gaming: $800–$1,200 (~250k–380k PKR)
- High-End 4K Gaming: $1,500+ (~500k PKR and above)
Factor in peripherals (keyboard, mouse, monitor) as they significantly affect the overall cost.
Step 2: Choose the Right Components
1. CPU (Processor)
- Handles game logic and background tasks
- Recommended: AMD Ryzen 5/7 or Intel Core i5/i7
- High-core CPUs are better for multitasking, streaming, or creative work
2. GPU (Graphics Card)
- Most important component for gaming
- NVIDIA GeForce RTX 3060+ or AMD Radeon RX 6600+ for mainstream gaming
- Consider resolution and refresh rate of your monitor
3. Motherboard
- Must be compatible with CPU (AM4, AM5, LGA1200, LGA1700)
- Check for RAM slots, PCIe lanes, and USB ports
- Optional: Wi-Fi and Bluetooth integration
4. RAM (Memory)
- Minimum: 16GB DDR4/DDR5
- For high-end setups: 32GB DDR5 for streaming and productivity
5. Storage
- SSD for operating system and games (NVMe recommended)
- Optional HDD for mass storage
- Ensure at least 500GB–1TB SSD for modern games
6. Power Supply (PSU)
- Quality PSU is critical for stability
- 80+ Bronze or higher efficiency rating
- Wattage depends on GPU and CPU (typically 650–850W for mid-to-high-end builds)
7. PC Case
- Ensure airflow, dust filters, and enough space for GPU
- Mid-tower cases are ideal for most setups
8. Cooling System
- Stock CPU cooler is fine for standard CPUs
- For overclocking, consider liquid cooling or high-performance air coolers
Step 3: Assemble Your Gaming PC
Prepare Your Workspace
- Flat, clean, anti-static surface
- Organize screws, tools, and components
Install CPU
- Align CPU with motherboard socket carefully
- Lock into place without applying too much pressure
Install RAM
- Insert RAM into designated slots, click until secure
- Consult motherboard manual for dual-channel configuration
Mount Motherboard
- Secure standoffs in case
- Align motherboard and screw it in
Install Storage
- Mount SSD/HDD in designated slots
- Connect SATA or NVMe cables
Install PSU
- Insert power supply
- Connect motherboard and GPU power cables
Install GPU
- Slot GPU into PCIe x16 port
- Secure with screws
Connect Cables
- Power cables, front panel connectors, USB headers, and fans
Step 4: Install Operating System and Drivers
- Install Windows 11/10 or Linux
- Update BIOS if needed
- Install GPU drivers and chipset software
- Configure system settings for performance
Step 5: Optimize for Gaming
- Enable XMP/DOCP for RAM speed
- Adjust GPU settings in NVIDIA/AMD control panel
- Keep drivers updated
- Use monitoring software for temperature and performance
Tips for a Smooth Gaming PC Build
- Check Compatibility: Use PCPartPicker to avoid conflicts
- Invest in PSU and Cooling: Prevents hardware damage and thermal throttling
- Cable Management: Improves airflow and aesthetics
- Plan Upgrades: Leave room for GPU, storage, or additional RAM
Common Mistakes to Avoid
- Ignoring motherboard compatibility
- Using low-quality PSU
- Forgetting thermal paste
- Skipping system updates
- Overpaying for RGB or unnecessary peripherals
Avoiding these mistakes ensures a stable and reliable system.
The Future of Custom Gaming PCs
The custom PC market continues to grow, with new technologies like DDR5, PCIe 5.0, and ray-tracing GPUs offering incredible performance. Building your own gaming PC not only provides better performance but also allows for future upgrades and customization. Whether for high-end gaming, streaming, or content creation, the skills you learn today will serve you for years.
Conclusion
Learning how to build a gaming PC empowers you with control, customization, and performance that pre-built systems rarely offer. From choosing the right components to assembling the machine and optimizing settings, every step contributes to a superior gaming experience.
With careful planning, proper tools, and attention to detail, even beginners can build a high-performance gaming PC that lasts for years. Take your gaming experience to the next level—start building today!


Related Posts

Medicare, Medicaid, and Beyond: Your Guide to Public Health Insurance in the USA
Cryptography: Developing Systems to Secure Data and Communications
Security Information and Event Management (SIEM): Monitor and Analyze Security Logs Effectively

BOE’s Struggle with iPhone OLED Production: Impact on Apple and the Display Industry

Penetration Testing: Identifying Website and Network Vulnerabilities

Weather App Development: Building a Real-Time Weather Application Using OpenWeatherMap API
Smart Energy Management System: Optimize Energy Consumption Using IoT, Sensors, and Actuators

Wearable Device Development: Track Fitness, Health, and Environmental Data with Arduino or Raspberry Pi

Predictive Modeling Using Machine Learning: A Complete Guide for Businesses

Predictive Modeling: Using Machine Learning to Predict Customer Churn, Sales, and Business Outcomes

Data Visualization Dashboard Development: Visualizing Insights Using Tableau, Power BI, and D3.js
Social Media Platform Development Using React, Node.js, and MongoDB
Blog Website Development: Using WordPress CMS or Building a Custom Blog with HTML, CSS, and JavaScript

Predictive Maintenance: Building a Machine Learning Model to Predict Equipment Failures and Reduce Downtime
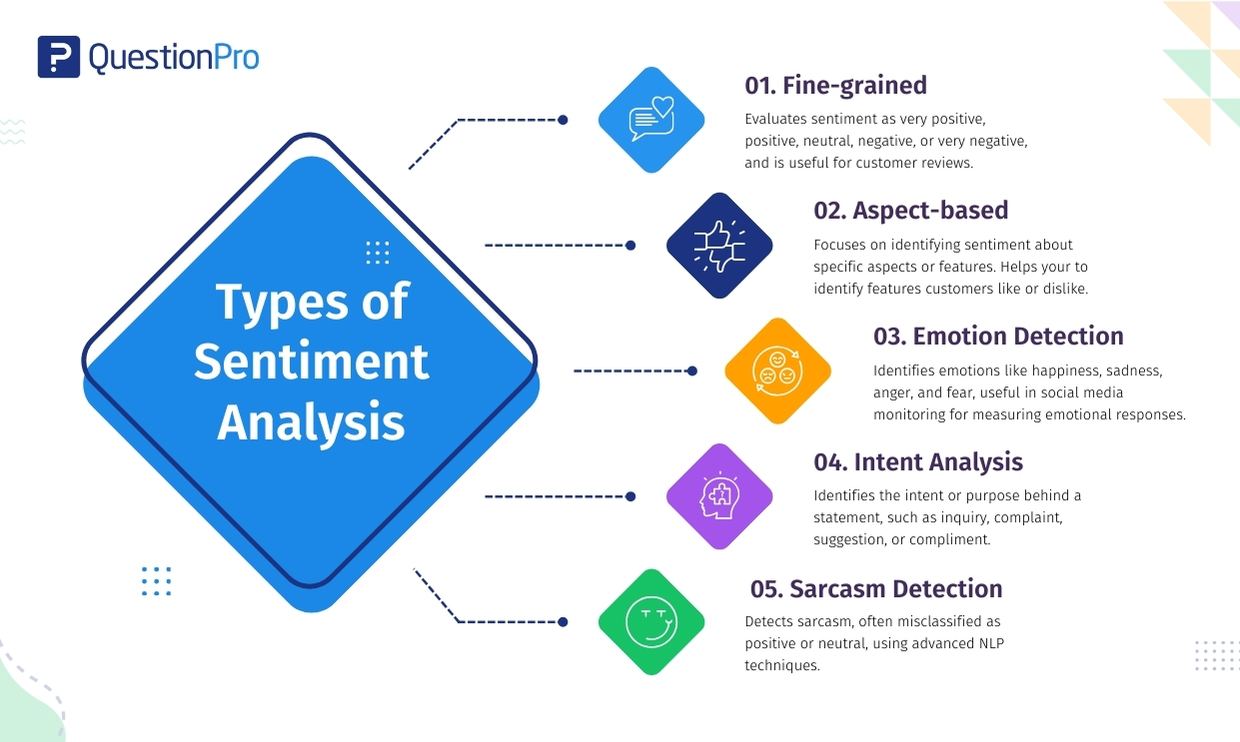
Sentiment Analysis: Building a Model to Analyze Text Data and Determine Sentiment

Image Classification: Develop a Deep Learning Model to Categorize Images

Chatbot Development: Build a Conversational AI Chatbot Using NLP and Machine Learning

Tech Industry Trends: Job market, skills in demand, and future prospects

Nanotechnology: Applications, Benefits, and Potential Risks

Change Management: Implementing Digital Transformation, Training, and Adoption

VR and AR Applications: Gaming, Education, and Enterprise Use Cases
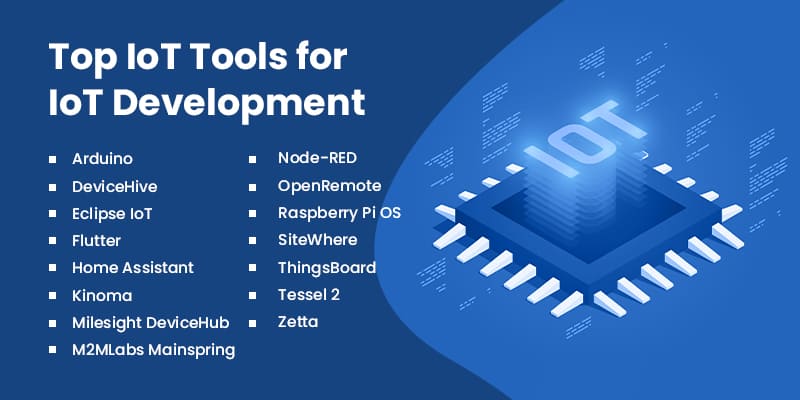
IoT Development: Platforms, Tools, and Programming Languages

Cloud Security: Data Protection, Access Control, and Compliance

Cloud Migration: Strategies, Benefits, Challenges, and Best Practices

French Court Ruling on Apple’s Tracking: App Tracking Transparency Stands

Robotics Breakthrough: Handy Robot That Can Crawl and Pick Up Objects

Apple, Google Announce Multi-Year AI Collaboration Using Gemini: A New Era for AI Assistants


PTA Tax Reduction: What It Means for Mobile Users in Pakistan

Gul Plaza Fire: How a Deadly Inferno Exposed Karachi’s Safety Failures

Verizon Outage Update Critical Service Restored After 10-Hour


The Importance of Data Analytics in Business Decision-Making

The Future of Autonomous Vehicles

75 Countries Visa Pause: What It Means for Global Travel and Immigration

School Closing in USA What Parents Should Know
School Closing in USA, What Parents Should Know


The Best Smartphones for Photography in 2026: Capture Every Moment in Stunning Detail


WordPress Not Loading: Reasons and How to Fix It

How to Fix Slow Loading Issues in Google Chrome

No-Code Business Ideas That Make Millions in 2026

How to Become a Tech Entrepreneur in 2026

How to Create a Successful YouTube Channel in 2026

Best Free Video Editing Software for YouTubers in 2026

How to Make Money Online in Pakistan: Proven Ways to Earn in 2026

Top 5 Laptops for Gaming in 2026: Ultimate Picks for Every Gamer

10 Ways to Boost Your Laptop’s Battery Life


Review of the Latest Smartwatch Trends: What’s Hot in Wearable Tech

Samsung vs iPhone Cameras: Which Is Better for Photography in 2026?

How AI is Changing the Way We Live and Work: Transforming Everyday Life

The Best Password Manager: Secure Your Digital Life in 2026

The Future of Drones in Pakistan: Transforming Industries and Innovation

How to Speed Up Your Laptop: Simple Tips That Actually Work

The Ethics of Facial Recognition Tech: Balancing Innovation and Privacy

The Role of Tech in Disaster Management: Saving Lives Through Innovation

The Future of 3D Printing: Transforming Manufacturing and Beyond

The Best Free Antivirus Software: Protect Your Devices Without Paying

How to Protect Your Phone from Hackers: Essential Security Tips

The Top Tech Conferences in Asia: Where Innovation Meets Opportunity

The Pros and Cons of Online Shopping: A Complete Guide for Modern Consumers

The Future of Virtual Assistants: Smarter, More Human, and Everywhere

Top Tech Myths Debunked: Separating Fact from Fiction

How AI is Changing Customer Service: Enhancing Support and Experience

Pakistan Top Tech Influencers to Follow: Insights, Reviews & Innovation
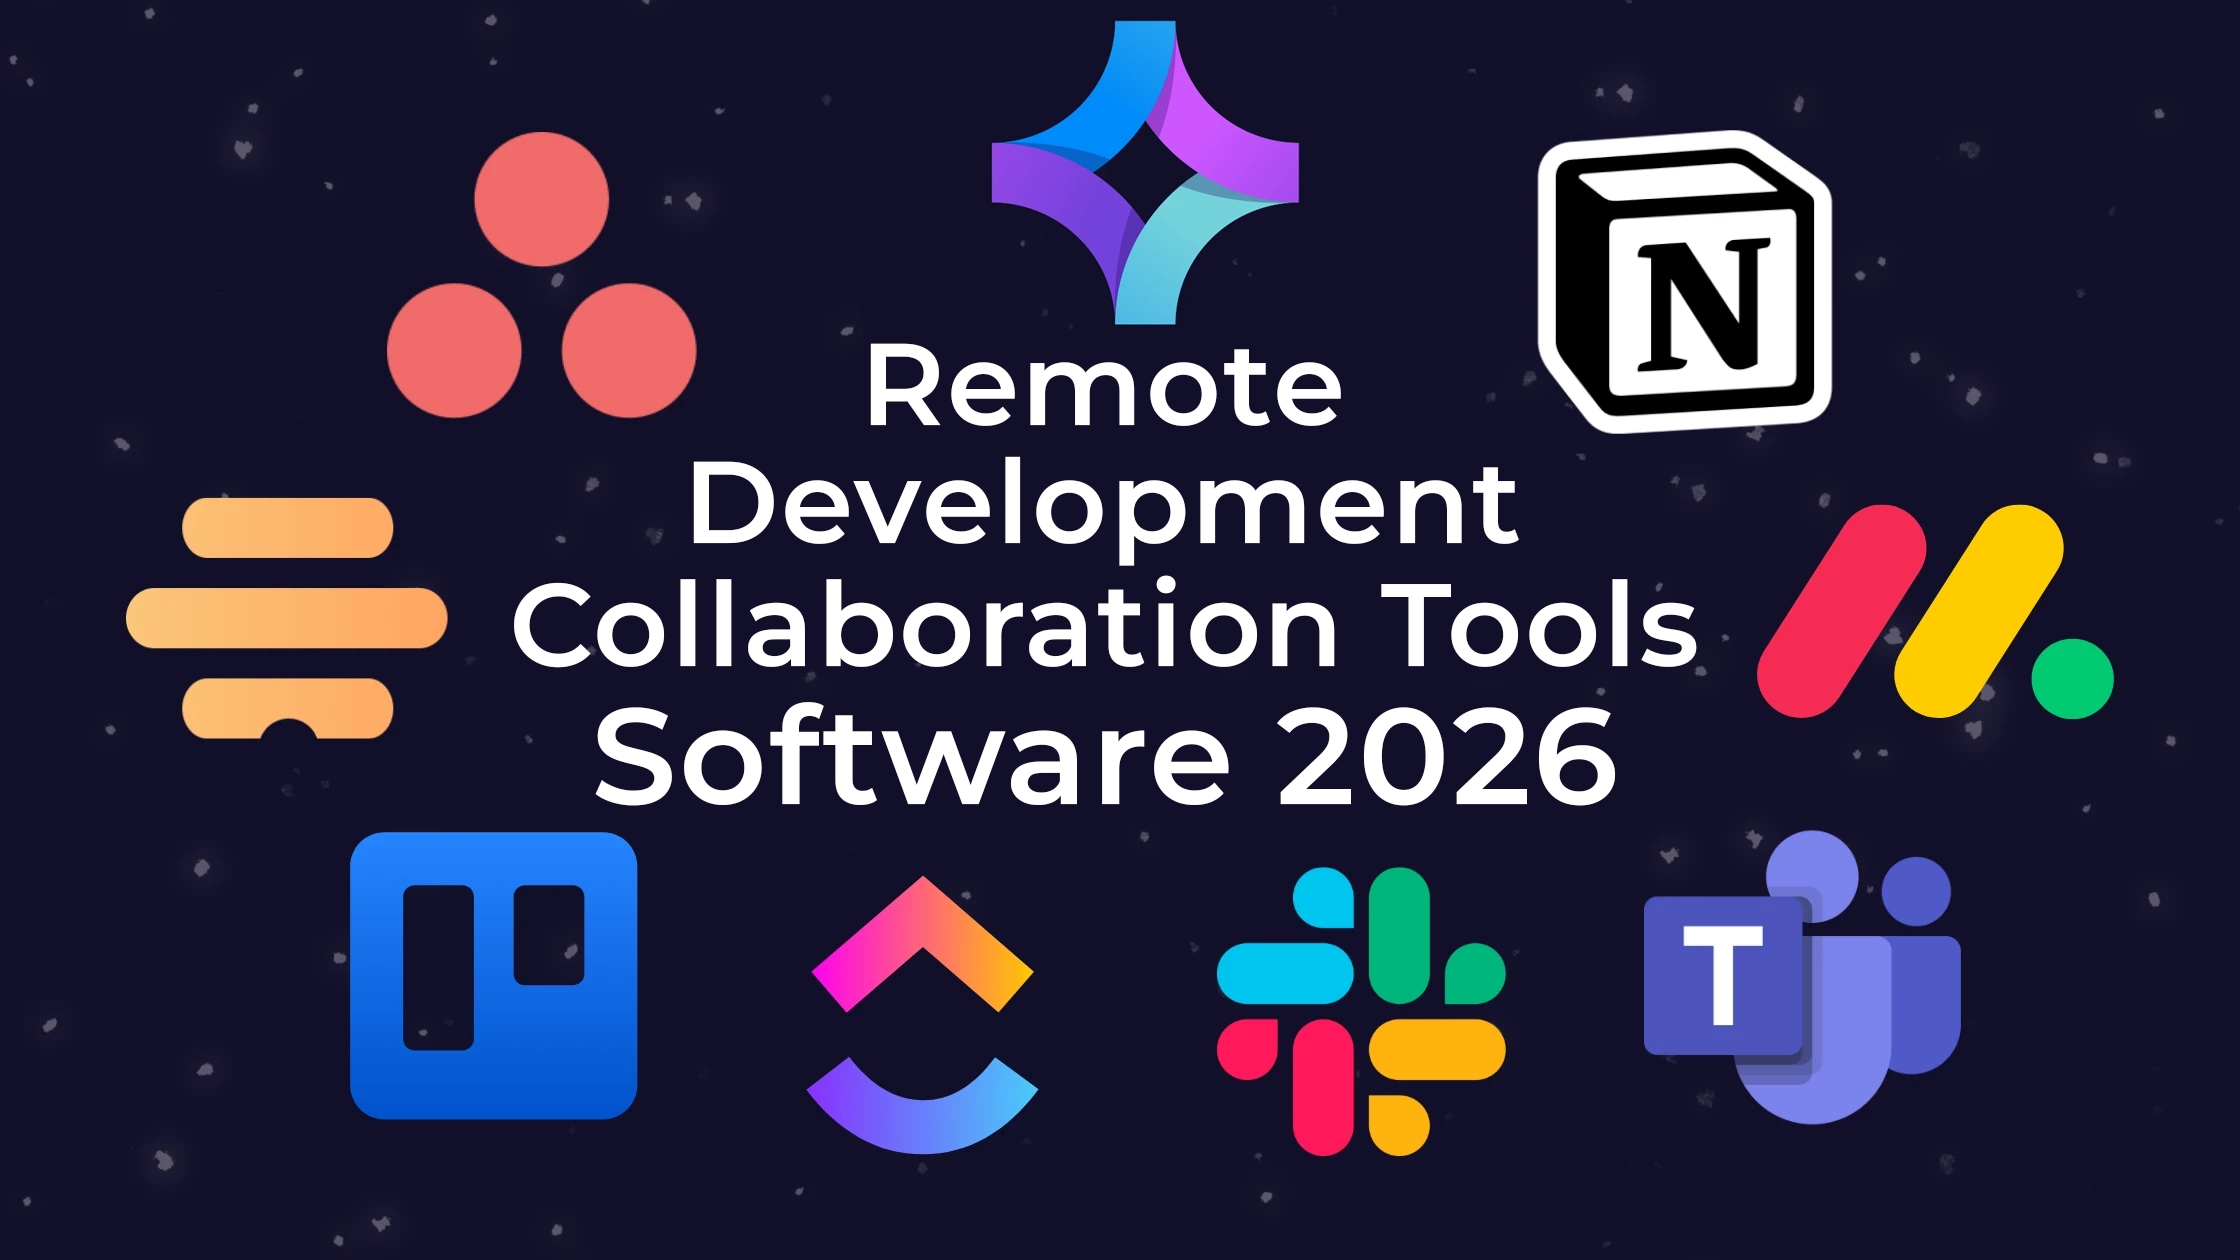
Best Remote Development Collaboration Tools Software 2026

The Rise of E-Sports in Pakistan: Gaming as a Professional Career

The Impact of Technology on Pakistan Education System : Transforming Learning and Teaching

The Top Tech Companies to Work for in Pakistan: Careers, Culture, and Opportunities

How to Protect Your Data Online: Tips for Cybersecurity and Privacy

The Role of Women in Pakistan Tech Industry: Breaking Barriers and Driving Innovation

The Dark Side of Social Media: Addiction & More
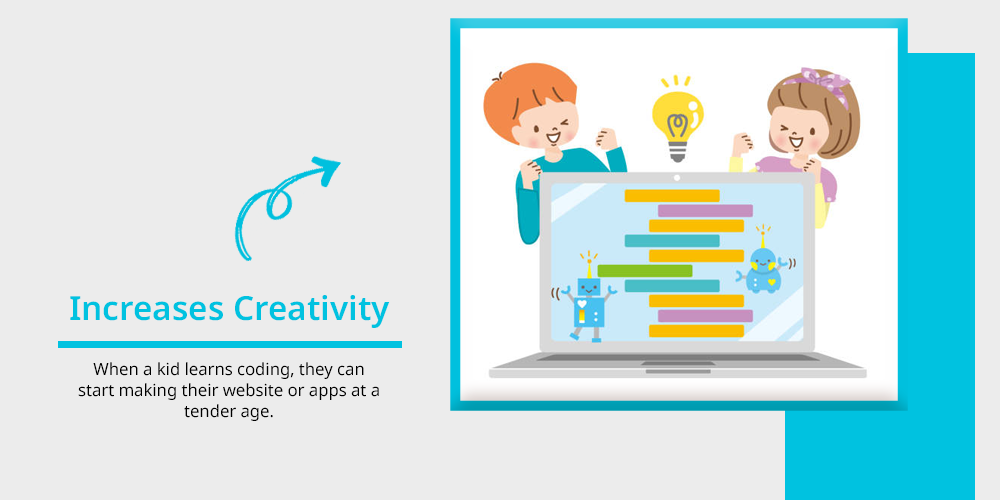
Coding for Kids: Is it Worth the Hype?

The Impact of IoT on Daily Life: Transforming How We Live, Work, and Interact

Top Tech Conferences in Pakistan: Networking, Innovation, and Growth Opportunities

The Future of Electric Vehicles in Pakistan: Opportunities, Challenges, and Growth

The Best Productivity Apps for Students: Maximize Learning and Time Management

Pakistan’s Digital Payment Revolution: Transforming Commerce and Financial Inclusion


The Impact of Technology on Pakistan’s Economy

Top Programming Languages to Learn

The Rise of E-Learning Platforms: Revolutionizing Education

Human-AI Collaboration Tools: AI as a True Teammate Enhancing Productivity and Creativity

Low-Code, No-Code, and AI-Assisted Dev: Democratizing Software Development with AI-Powered Tools

Generative AI 2.0: Multimodal AI systems that combine text, visuals, code, and data, unlocking new enterprise applications

AI Governance and Regulation: Ensuring AI Transparency, Fairness, and Accountability

Humanoid Robots: AGIBOT’s Production-Ready Robots Are Changing Industries
AI in Everyday Life: How AI Is Transforming Daily Tasks and Experiences

AI in Healthcare: How Machine Learning Is Revolutionizing Patient Care
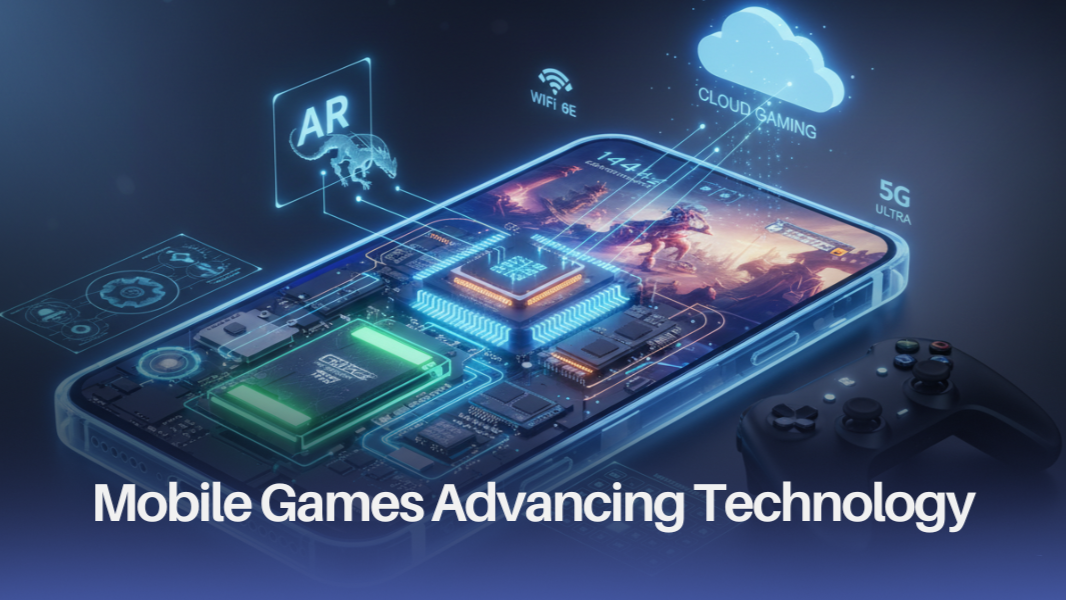
Gaming on the Go: The Evolution of Mobile Gaming

The Ethics of Technology: Balancing innovation with responsibility

Virtual Reality: Transforming the Way We Experience the Digital World

Demystifying Quantum Computing: What You Need to Know

The Role of Internet of Things in smart cities (IoT) in Shaping the Future of Cities
The Top Emerging Tech Trends in Pakistan

The Benefits and Drawbacks of Virtual Reality in Education

How Blockchain is Revolutionizing Industries Beyond Crypto currency

The Pros and Cons of Facial Recognition Technology

The Rise of Smart Homes: How Technology Is Changing the Way We Live

Cybersecurity in the Age of Remote Work: Challenges and Solutions


The Future of Artificial Intelligence: Trends to Watch

The Benefits of Microservices Architecture for Modern Applications

The Role of Artificial Intelligence in Predictive Maintenance

How Businesses Can Leverage Social Media Analytics for Growth

The Impact of Quantum Computing on Cybersecurity: A New Era of Threats

The Benefits of Serverless Computing 2026, The Architecture for Modern Applications

Why Businesses Should Prioritize Digital Transformation in 2026

The Potential of Augmented Reality in Education and Training

The Role of DevOps in Modern Software Development: Benefits and Challenges

Cloud Computing for Small Businesses: Benefits and Best Practices

The Future of Work: How Automation and AI Are Transforming the Job Market

Blockchain in Supply Chain Management: A Game-Changer for Transparency and Efficiency

Data Analytics: Unlocking Business Insights and Driving Growth

5G for Businesses: Leveraging Next-Gen Connectivity for Growth

Cybersecurity in the Age of IoT: Threats and Opportunities

The Future of E-commerce: How AI is Revolutionizing Online Shopping

Birdbuddy Smart Bird Feeder Launches at CES 2026: Birdbuddy 2 and Birdbuddy 2 Mini

Descriptive Set Theory and Computer Science: A New Bridge Links the Strange Math of Infinity to Algorithms

Most Anticipated Video Games 2026 That Gamers Can’t Wait For

Voicebuds: Subtle Launches Next Generation Earbuds for Voice Computing

Robots: Transforming the Future of Technology and Daily Life

Graphic Designing: The Art and Science of Visual Communication

Xthings Smart Home Devices at CES 2026 Redefine Home Security and Automation

SwitchBot Onero H1 Home Robot Redefines Smart Living at CES 2026

Beats Solo 4 Headphones Deal: Amazon Slashes $70 Off in All Colors

Digital Marketing Services for Small Businesses: Simply Social Media LLC Expands to Drive Growth
Why Japan’s Internet Feels Unusual to Outsiders — But Makes Sense to Locals

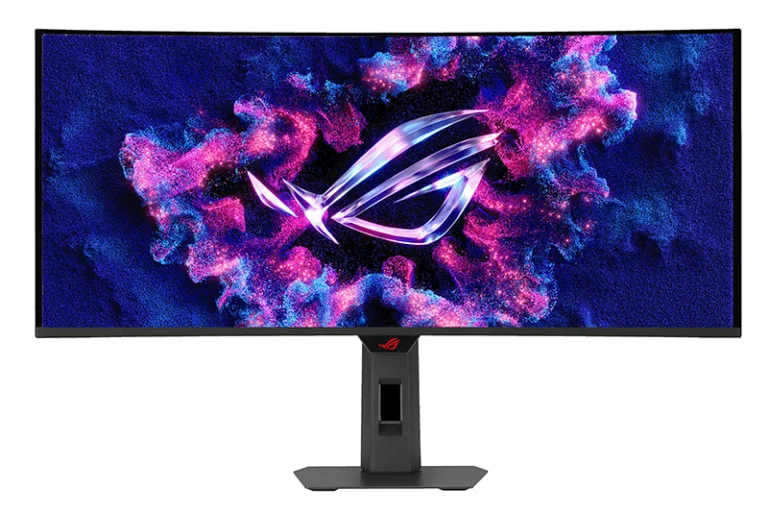
ASUS Unveils ROG Strix XG34WCDMS Featuring a 34-Inch 280Hz 5th-Gen QD-OLED Display

The Top Agentic AI Browsers to Watch in 2026